Seasonal Home Care
How to Open and Clean Window Screens Before Pollen Season
Get window screens ready for spring with safe removal tips, gentle cleaning methods, and a quick inspection routine for clearer views and less-obstructed airflow.
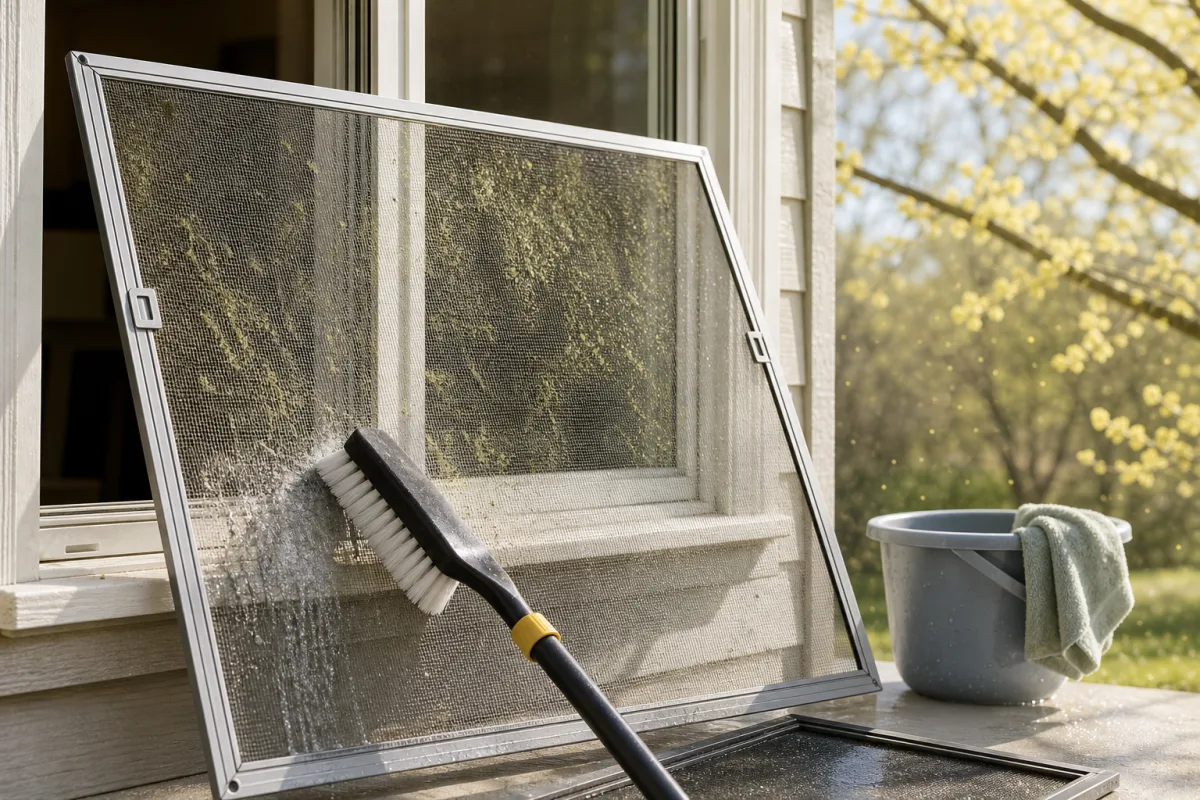
Pollen season is a good reminder to clean the surfaces between your home and the outdoors. Window screens can collect dust, cobwebs, outdoor grime, and pollen left over from previous seasons, making views look hazy and leaving a layer of debris at the window.
The best way to clean window screens depends on how your windows are built. Some screens lift out from indoors with tabs or springs, while others use pins, clips, or hardware that may not be immediately visible. Identifying the screen style before you start helps prevent bent frames, torn mesh, and frustration.
Why Clean Window Screens Before Pollen Season
Screen mesh can collect dust, cobwebs, outdoor grime, and pollen over time. Even when the mesh does not look especially dirty up close, buildup can make the view through a window appear dull.
Cleaning screens before you begin opening windows regularly offers a few practical benefits:
- Clearer views through the window
- A clearer path for fresh air when windows are open
- Removal of loose dust, cobwebs, and grime around the window opening
- A cleaner starting point for spring cleaning
- A chance to spot screen damage before insects become active
Cleaning will not prevent new pollen from landing on screens during the season, but it removes debris that has already accumulated. A quick brush or vacuum later in spring can help keep buildup manageable.
Identify Your Window and Screen Type First
Before trying to remove anything, look closely at the screen and window frame. Window screens are not all installed the same way, and a method that works on one window may damage another.
Common arrangements include:
- Full screens: Cover most or all of the window opening.
- Half screens: Cover one portion of a double-hung window, often the lower sash area.
- Fixed screens: Designed to remain in place unless the window manufacturer provides a specific service or removal procedure.
- Sliding-window screens: Usually sit in a dedicated track and may move sideways or release through spring tension.
Look for release hardware around the screen frame. You may find lift tabs, pull pins, spring clips, plunger pins, or tension springs. These parts are often located along the sides, bottom, or top of the frame.
If the screen seems fixed in place, do not pry it out. Check the instructions for your window model to confirm whether the screen is removable, which side it releases from, and whether any hardware must be disengaged first.
Gather Screen-Safe Cleaning Supplies
Having supplies ready before you open or remove a screen makes the process smoother. Use gentle tools that will not snag mesh, scratch a frame, or damage its finish.
Gather the following:
- Vacuum with a soft brush attachment
- Soft-bristle brush
- Microfiber cloths
- Bucket
- Mild soap and water
- Garden hose with a gentle spray setting
- Towel, clean sheet, or another clean flat surface for drying
Avoid abrasive scrub pads, stiff wire brushes, harsh chemicals, and high-pressure water. These can stretch or tear the mesh, bend a lightweight frame, loosen the spline that holds the mesh in place, or damage screen coatings.
How to Open or Remove Window Screens Safely
Start with the window fully open so you can see how the screen sits in its channel. Examine the frame before pulling on tabs or pressing hardware.
Use a Controlled Removal Technique
For many removable screens, the general process is to hold the frame securely, release one side, and angle the frame inward for removal. The exact direction varies by design. A screen with spring-loaded sides, for example, often needs to be pushed toward the spring side first so the opposite edge can clear its channel.
Keep both hands on the frame whenever possible. Avoid pressing hard on the mesh itself, which can stretch or tear more easily than the surrounding frame.
Some screens are designed to come out from inside the home. Others may release from outdoors, especially on certain storm windows, sliding windows, or specialty installations. Follow the design of your particular window rather than forcing the screen in a direction that feels wrong.
Label Screens Before Cleaning
If you are removing several screens, label them by room or location. A small piece of painter’s tape on the frame can help you return each one to its original opening. This is especially useful when screens look similar but have slightly different dimensions or hardware placement.
Do Not Force a Stuck Screen
A screen may stick because of paint, packed dirt, a bent frame, or hidden fasteners. Stop if it does not release with reasonable, gentle pressure. Inspect the edges and tracks, remove visible debris, and look again for pins, clips, or screws.
If you still cannot identify the release method, consult the manufacturer’s instructions for your window model. Forcing a stuck screen can bend the frame, tear the mesh, or damage the window channel.
Clean Screens Without Removing Them
In-place cleaning is useful for screens that cannot be removed easily or only need light cleaning. It can also be the safer choice for upper-story windows or hard-to-reach screens.
Do not lean out of a window or attempt to remove an exterior screen from an unsafe position.
- Open the window as far as possible.
- Vacuum the screen gently with a soft brush attachment to lift loose dust, pollen, and cobwebs.
- Dampen a microfiber cloth with mild soapy water. The cloth should be lightly damp, not dripping.
- Wipe the screen gently without pressing hard enough to stretch the mesh.
- Use a second clean cloth dampened with plain water to remove soap residue.
- Let the screen air-dry fully before closing the window.
Use this method for maintenance cleaning rather than heavy grime. A screen with substantial buildup generally benefits from being removed and washed on a supported, flat surface.
Wash Removed Screens Step by Step
Removing screens makes it easier to clean both sides thoroughly. Handle them carefully throughout the process, since unsupported frames can bend and mesh can stretch under pressure.
Support the Screen Before Washing
Lay each screen flat on a clean surface, such as a patio, driveway, clean lawn area, or large towel. Supporting the entire frame helps prevent twisting and reduces stress on the mesh.
Rinse and Wash Gently
- Rinse the screen with a gentle stream of water to remove loose debris.
- Mix mild soap with water in a bucket.
- Use a soft-bristle brush or microfiber cloth to clean one side of the screen.
- Work gently across the mesh and frame without scrubbing aggressively or pushing the mesh out of shape.
- Repeat on the other side.
- Rinse thoroughly with gentle water until soap residue is gone.
Do not use a pressure washer or a forceful hose nozzle. Strong water pressure can deform the mesh, dislodge spline, and bend the frame.
Dry Completely Before Reinstallation
Allow the screen to dry completely while it remains supported. Lay it flat on a clean towel or place it securely where air can circulate around it. Reinstalling a wet screen can leave moisture against the window frame or in the screen channel.
Clean the Window Tracks and Frames While the Screens Are Out
With the screens removed, take advantage of the clear access to the window tracks, sills, and frame channels. Dirt in these areas can interfere with smooth screen installation and normal window operation.
Start by vacuuming loose dirt from tracks, sills, and channels. Then wipe the surfaces with a damp microfiber cloth and a mild cleaner appropriate for your window material. Avoid soaking wood components or using products that are not suitable for painted, vinyl, aluminum, or fiberglass frames.
Check visible drainage holes, sometimes called weep holes, near the exterior portion of the frame. Clear away loose debris blocking them, but do not enlarge the holes or seal them. These openings are intended to direct water out of the frame.
Before reinstalling the screen, inspect its channel for dirt, dried paint, or buildup that could prevent the frame from seating properly.
Inspect Screens for Damage and Repair Needs
Cleaning is also a good time to inspect each screen. A small issue may be easier to address now than after you have started using open windows more often.
Look for:
- Tears or holes in the mesh
- Loose spline around the edge of the frame
- Stretched or sagging mesh
- Bent or warped screen frames
- Broken lift tabs, clips, pins, or springs
- Hardware that does not move or engage properly
Small holes, loose spline, and some hardware problems may be repairable. However, badly stretched mesh, severely bent frames, or warped screens may need replacement. Once reinstalled, a screen should fit snugly enough to help keep insects out while allowing the window to operate normally.
Reinstall Screens and Prepare for the Season
Confirm that every screen is completely dry and correctly oriented before putting it back. If you labeled the screens, match each label to the correct window opening.
Seat the frame gently into its track or channel. Engage pins, clips, or springs according to the screen design, using steady pressure rather than force. If the screen does not fit easily, remove it and check for debris in the track, reversed orientation, or a bent frame.
After installation, test the window:
- Open and close it normally.
- Confirm that it locks as intended.
- Check that the screen sits securely in its channel.
- Make sure no tabs, clips, or pins are left partly engaged.
During periods of heavy pollen, a light brushing or vacuuming can keep screens from becoming heavily coated again. Checking screens when you wipe windowsills or clean entry areas can make seasonal maintenance easier.
A Cleaner Start to Open-Window Weather
Cleaning window screens before pollen season can make spring windows look clearer and help you start the season with cleaner frames, tracks, and mesh. Careful handling and a quick inspection protect the screen while helping it continue to keep insects out.
If the hardware is unfamiliar or the screen seems fixed, consult the instructions for your specific window model instead of forcing it.