Seasonal Home Care
How to Open and Inspect Outdoor Sprinkler Systems in Spring
Open your sprinkler system slowly each spring to find winter damage, leaks, controller issues, and coverage problems before regular watering begins.
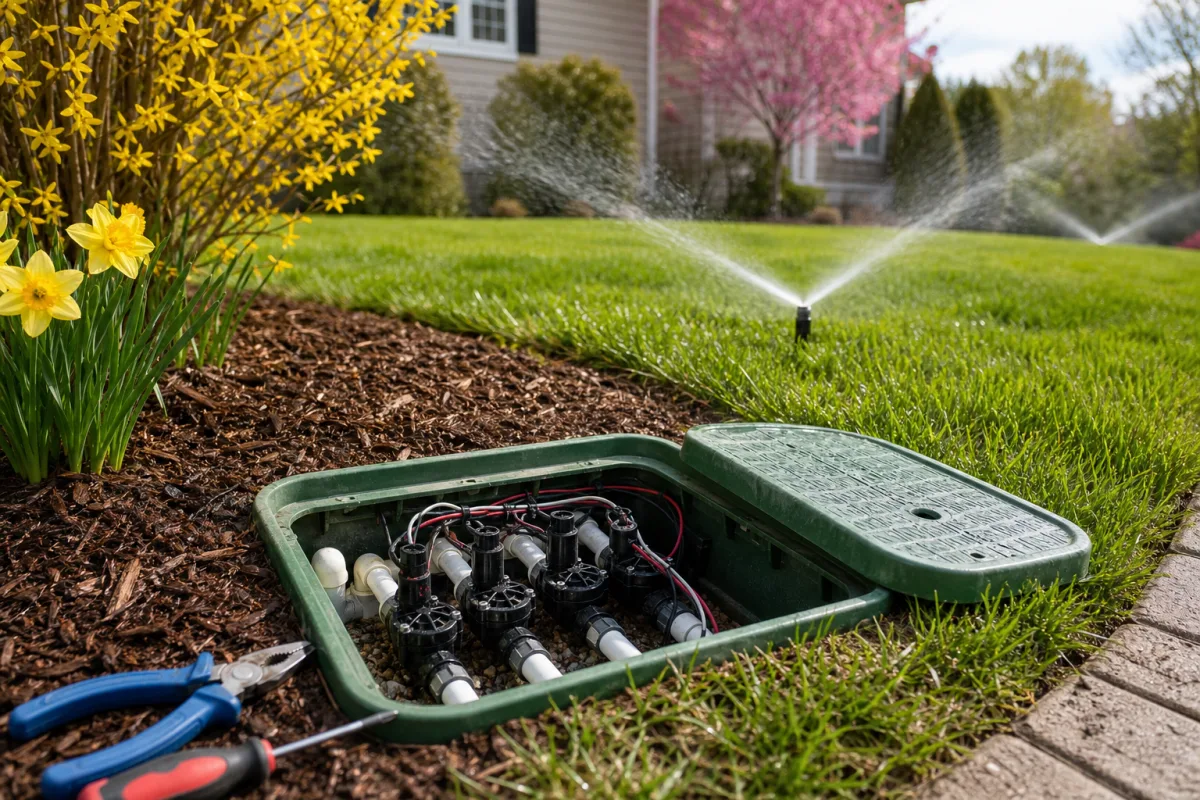
Spring sprinkler startup involves more than turning the water back on. Freezing temperatures and winter moisture can damage fittings, valves, sprinkler heads, wiring, and backflow equipment. A careful inspection helps you find problems before they waste water or become larger repairs.
Plan to inspect the system in daylight, when it is easier to see spray patterns, pooling, overspray, and dry areas. Work through the system slowly, one zone at a time, and keep notes or photos of anything that needs attention.
Choose the Right Time to Open the System
Wait until the risk of a hard freeze has passed in your area before restoring water to buried irrigation lines. A late freeze can damage a system that has already been filled and pressurized.
Make sure the ground has thawed enough to safely access valve boxes, exposed piping, backflow equipment, and sprinkler heads. Avoid digging in saturated soil or repeatedly walking on a soft lawn, which can damage turf and make components harder to locate.
Before startup, review local watering rules and any requirements for backflow preventers. Watering days, permitted hours, and backflow testing requirements vary by location.
Gather Basic Tools and Review the System Layout
A few basic items can make the inspection easier:
- Flathead screwdriver for adjusting compatible sprinkler heads
- Small shovel or hand trowel for carefully clearing soil around heads and valve boxes
- Pliers for minor, accessible hardware adjustments
- Compatible replacement nozzles or sprinkler heads, if needed
- Notebook or phone for photos and repair notes
- Gloves and eye protection
Locate the irrigation main shutoff valve, backflow preventer, controller, valve boxes, and sprinkler zones before turning on the water. If you have an irrigation map, service paperwork, photos, or notes from last season, use them to identify head locations and known trouble spots.
Inspect Above-Ground Components Before Turning on Water
Check exposed irrigation components before they are pressurized. Look at piping, fittings, shutoff valves, and the backflow assembly for visible cracks, loose connections, corrosion, or other signs of winter damage.
Confirm that drain valves and manual drains opened during winterization are now closed. An open drain can cause obvious water loss when the system is filled.
Inspect the controller enclosure, too. Look for a damaged cover, moisture around electrical connections, damaged wires, or signs that pests entered the unit. Do not handle damaged electrical connections while power is on.
Restore Water Pressure Slowly
Open the irrigation system's main shutoff valve gradually. Filling the lines slowly reduces the sudden pressure surge that can worsen a weak fitting or damaged component.
As the system fills, listen and watch around exposed equipment and accessible valve boxes. Shut the water off if you notice any of the following:
- Water spraying from a fitting, valve, or backflow assembly
- Repeated pooling near the shutoff, piping, or valve box
- A strong, ongoing hissing or rushing sound
- Visible water movement or continued rushing after the main valve has been closed
- Erratic spraying or unusually weak performance when a zone is tested
Address visible leaks before testing the system normally. Do not keep running a zone to see whether a pressurized leak improves.
Check the Backflow Preventer and Main Valves
Open valves on the backflow preventer according to the instructions for your specific device. Check the assembly for drips, leaks, cracked components, and fittings that do not seal correctly.
Make sure isolation valves are returned to their normal operating positions after winter shutdown. Valve handles are often aligned with the pipe when open, but confirm the correct position for your equipment rather than relying only on that general rule.
Do not disassemble, bypass, cap, or modify a backflow preventer. Follow the device instructions and applicable local requirements. If the assembly is damaged, continues leaking, or requires testing under local rules, contact a qualified irrigation or backflow professional.
Test Each Sprinkler Zone One at a Time
Use the controller's manual-run feature to operate one zone at a time. Let each zone run long enough to observe every sprinkler head and the area it is intended to water.
Watch for heads that do not rise, have weak spray, stay stuck above ground, fail to spray, or continue leaking after the zone turns off. Also look for low-pressure symptoms across a zone, such as multiple heads barely spraying or failing to reach their normal distance.
Low pressure can have several causes, including a broken line, leaking valve, clogged nozzle, or excessive demand on the zone. A sudden wet area, bubbling soil, or pooling water while a zone is running can indicate a possible underground leak.
Document issues by zone. A photo and a short note about the head location or symptom can make repairs and future seasonal inspections easier.
Inspect Sprinkler Heads, Nozzles, and Coverage
Clear grass, mulch, soil, and debris away from sprinkler heads so they can pop up and retract correctly. Heads buried too deeply may not deliver water properly and can be damaged by lawn equipment.
Straighten tilted heads and adjust spray direction as needed. Water should land on lawns, planting beds, and other intended landscape areas—not pavement, siding, fences, driveways, or neighboring property.
Check the spray pattern for these common problems:
| Problem | Possible cause | Typical next step |
|---|---|---|
| Weak or distorted spray | Clogged or damaged nozzle | Clean or replace it with a compatible nozzle |
| Head does not pop up | Dirt, turf interference, or a damaged head | Clear around it; replace the head if damaged |
| Water spraying onto hard surfaces | Misaligned head or incorrect nozzle | Adjust direction or install a suitable nozzle |
| Dry spot between heads | Coverage gap, blocked spray, or poor spacing | Check head alignment and nozzle performance |
| Water draining from a low head after shutdown | Water remaining in the line | Brief drainage may be normal; investigate persistent seepage or pooling |
Replace visibly cracked heads or damaged nozzles with compatible parts. If you are unsure which replacement is correct, record the brand and model information from the existing component and consult an irrigation supplier or professional.
Check Valve Boxes, Wiring, and the Irrigation Controller
Open valve boxes carefully. Remove loose leaves, soil, and debris, then check for standing water, leaking fittings, damaged valve parts, or loose wiring connections.
Do not dig or probe aggressively around a valve box. Wires, fittings, and valves may be close to the surface. Use a hand trowel carefully, avoid pulling on wires or forcing a valve, and stop if components are damaged or their layout is unclear.
Inspect accessible low-voltage irrigation wiring for disconnected, cut, or exposed sections. Wiring damage can prevent a zone from operating or cause intermittent controller problems. Inaccessible wiring issues, damaged connections, and controller faults are often best handled by an irrigation technician.
At the controller, confirm the date, time, zone settings, and seasonal schedule. Winter power interruptions can reset programming. If your system has a rain sensor, soil-moisture sensor, or weather-based controller, confirm that the sensor is enabled and follow the controller or sensor manufacturer's procedure for checking its operation.
Address Repairs Before Setting a Regular Schedule
Make repairs before relying on the system for routine watering. For minor, accessible work, turn off the water and relieve pressure as appropriate before removing or replacing a component.
Professional service is a sensible choice for suspected underground line breaks, recurring leaks, valve failures, damaged wiring, controller faults, or backflow concerns. These problems may involve pressurized water, buried infrastructure, or electrical components that need specialized diagnosis.
Do not compensate for poor coverage or low pressure by increasing run times. Longer watering can waste water, create runoff, and harm plants or soil while leaving the underlying problem unresolved.
Set Up for Efficient Spring Watering
Once the system is operating properly, begin with a conservative watering schedule. Adjust it for rainfall, plant needs, soil conditions, temperatures, and applicable local restrictions.
Schedule irrigation during permitted hours and avoid watering when rain is expected. Check that water soaks into the soil rather than running down sidewalks, driveways, or slopes.
Reinspect the system after the first few normal watering cycles. Small leaks, settling sprinkler heads, and uneven coverage can become more noticeable once the system is operating on its regular schedule.
By opening the system slowly, inspecting every zone, and documenting needed repairs, you can identify spring problems before regular watering begins and support more even, efficient irrigation through the growing season.