Seasonal Home Care
Best Roof Rakes for Snow: Types That Help Protect Shingles
The best roof rakes for snow match your roof height, snow conditions, and available ground-level working space. Compare standard, extension-pole, chute-style, and protective-edge designs to choose a rake you can control without scraping shingles.
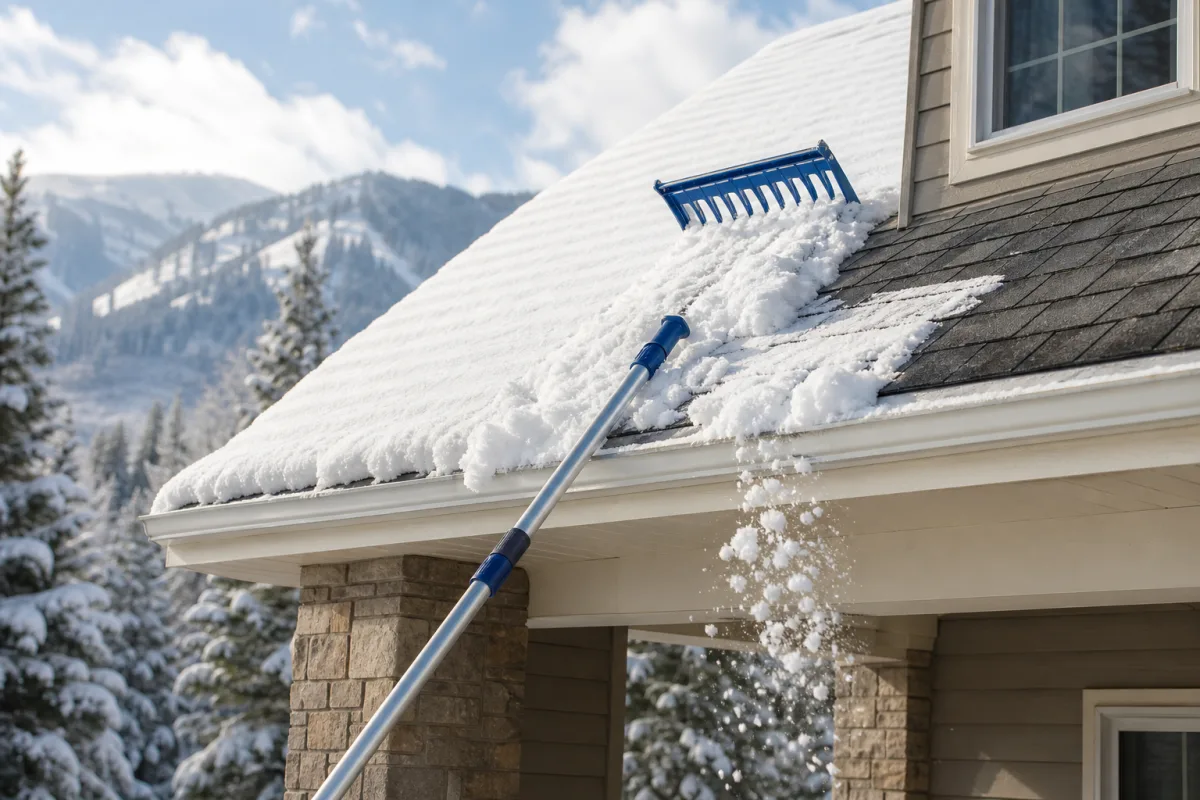
A roof rake is a ground-operated tool for pulling snow from the accessible lower portion of a sloped roof. Used carefully, it can help reduce snow buildup near eaves without requiring you to climb onto the roof.
The best roof rakes for snow are not necessarily the longest or widest models. The right choice gives you enough working reach from stable ground, a head you can control around shingles and gutters, and a manageable way to move the type of snow common in your area.
This guide compares roof rake types and the features worth checking before you buy. Product specifications, roof-material guidance, replacement parts, and availability vary by manufacturer and model, so always read the current product instructions.
What a Roof Rake Can—and Cannot Do
A roof rake can pull accessible snow from the lower roof area in small, controlled sections. It is most useful when snow is accumulating near eaves and there is a clear, safe area below for snow to fall.
It is not intended to make a roof completely bare. On asphalt shingles, avoid scraping down to the roofing surface. Leave a light layer of snow rather than forcing the rake into shingle tabs, granules, flashing, or gutters.
Important limitations
Removing snow near the eaves does not diagnose or solve every cause of ice dams. Insulation, ventilation, air leaks, roof geometry, drainage, weather conditions, and existing ice can all play a role.
A roof rake is also not an ice-removal tool. Do not use one to chop bonded ice, pry at gutters, or pull down a large frozen sheet of snow. Seek qualified help if you notice leaks, roof sagging, damaged shingles, loose gutters, bent flashing, or other signs of roof distress.
Best Roof Rake Types by Use Case
There is no one-size-fits-all snow roof rake. Consider eave height, roof layout, snow depth, obstacles, and how much control you need while standing safely on the ground.
| Best for | Roof rake type | Features to prioritize | Main tradeoff |
|---|---|---|---|
| Low, open eaves | Lightweight standard roof rake | Moderate reach, low weight, smooth broad head | May not reach taller rooflines |
| Higher accessible eaves | Extension-pole roof rake | Secure section locks, limited flex, comfortable grip | Long poles can be difficult to control |
| Deeper, loose snow | Chute- or slide-style roof rake | Secure head-to-slide connection and clear landing area | Requires more setup and open space |
| Asphalt shingles | Protective-edge, bumper, or roller design | Manufacturer guidance for roofing use | Does not make aggressive scraping safe |
| Gutters and roof obstacles | Narrower, maneuverable rake head | Precise placement and lower pull force | Clears a smaller strip per pass |
| Small storage areas | Break-down or telescoping rake | Reliable connectors and compact stored size | More joints need inspection |
Lightweight standard roof rakes for low eaves
For a one-story home or another low roof edge reachable from level ground, a conventional lightweight rake is often the simplest choice. A moderate-length pole is generally easier to raise, position, and control than an extra-long setup.
Choose a head wide enough to clear a useful path without making wet snow too difficult to pull. Several smaller passes are usually more manageable than one oversized load.
Extension-pole roof rakes for taller eaves
An extension pole roof rake can be a practical option when you can reach the lower roof area while keeping stable footing on the ground. Check the manufacturer’s assembled length, pole-lock design, weight, and operating instructions.
Extra reach adds leverage and may increase flex. If a rake reaches the roof but cannot be held steadily, it is not a good fit. Never make up for inadequate reach by standing on a ladder, step stool, railing, icy bank, or snow pile.
Chute-style roof rakes for deeper snow
A chute-style roof rake uses a fabric or plastic slide attached behind the rake head. After the head loosens a section of snow, the slide helps direct snow toward the ground instead of requiring you to drag it over a larger roof area.
This style can be useful for deeper loose snow, but it still requires restraint. Wet, packed, crusted, or partially frozen snow can be difficult to predict and very heavy.
Before buying a chute-style model, make sure you have:
- A clear fall zone from the roof edge to the ground.
- Enough space for the slide to extend away from the house.
- No people, pets, vehicles, doorways, walkways, or valuable items in the expected snow path.
- A plan to clear snow away from entrances after it falls.
Protective-edge designs for shingles
For a roof rake for shingles, look for a smooth contact edge, bumper, or roller system that the manufacturer specifically describes as suitable for roof use. These designs differ by model, so do not assume that every plastic edge or roller prevents contact with roofing.
Technique remains more important than the feature itself. Use light, controlled pulls, avoid downward pressure, and stop if the rake catches. No roof rake should be used as a shingle scraper.
Narrow rake heads for gutters and roof features
A narrower rake head can offer better control around gutters, valleys, vents, skylights, flashing, solar equipment, and other roof attachments. It clears less snow per pass, but that may be a worthwhile compromise where a wider head could catch or pull snow unpredictably.
Avoid hitting roof components directly. Snow may hang up around these areas and release suddenly even if the rake does not make contact.
How to Choose the Right Working Reach
Do not choose a rake based only on its advertised pole length. What matters is the working distance from your safe standing position to the lower roof area you plan to clear.
Measure before you buy
- Identify a level, stable location where you can stand.
- Identify the lower roof area you need to reach, not the roof peak.
- Estimate the diagonal distance from your standing location to that area.
- Add enough margin to hold and guide the rake without leaning, stretching, or stepping into the fall zone.
- Compare your measurement with the manufacturer’s stated fully assembled usable length.
For example, a roof edge that is 12 feet above ground may require more than 12 feet of working reach if you must stand several feet away from the wall. If the required reach would force you onto a ladder or directly beneath falling snow, a ground-operated DIY roof rake is not the right solution.
Features to Compare Before Buying
Reach, weight, and pole stiffness
Compare the fully assembled rake, not just individual pole sections. Aluminum, fiberglass, and mixed-material poles can handle differently depending on their diameter, wall thickness, grips, and connector construction.
Look for:
- A stated assembled length that fits your measured working reach.
- A total weight you can lift and control through repeated passes.
- Pole sections that do not twist, bend excessively, or separate during normal use.
- Secure pins, locks, or threaded connectors that are easy to inspect.
- Grips that remain secure while wearing winter gloves.
Head width and snow load
A wide head can clear more snow in one pull, but it also increases resistance and can create a heavier load. A smaller head is slower on open roof sections but can be easier to control near gutters and roof features.
For wet or dense snow, prioritize control over maximum width. Pulling smaller sections reduces the chance of a sudden, heavy release.
Contact design for asphalt shingles
Follow the manufacturer’s instructions for the rake’s contact edge, rollers, bumpers, and compatible roof materials. Even a shingle-friendly design should be used gently and should not be driven into the roof surface.
A thin layer of snow left behind is preferable to scraping shingles, damaging granules, or catching a shingle edge.
Chute material and attachments
If you are considering a chute-style rake, check the slide material, its attachment hardware, and whether replacement fabric or parts are available. A torn or poorly attached slide can make the tool harder to manage.
Also consider where the chute will end. Do not direct snow toward a doorway, public walkway, vehicle, utility equipment, or neighboring property.
Storage and replacement parts
Roof rakes are seasonal tools, so storage and maintenance matter. Check whether the rake breaks down for storage and whether the manufacturer offers replacement connectors, bumpers, rollers, or chute material when applicable.
Read the manual for assembly instructions, intended uses, roof-material limitations, and maintenance requirements before using the tool.
How to Use a Roof Rake Without Damaging Shingles
The goal is to remove a little snow at a time while staying on firm ground and out of the snow-fall zone.
Set up a safe work area
Stand on stable, level ground with dependable traction. Avoid icy slopes, uneven landscaping, snowbanks, and positions that require awkward overhead reaching.
Keep people, pets, vehicles, and movable items out of the snow-fall area. Plan where you will step if snow releases, and do not stand directly under the roof section you are working on.
Stay away from electrical lines
Do not operate a roof rake near overhead power lines, electrical service drops, or electrical equipment. Do not try to judge clearance while handling a long pole, especially if it is aluminum or another conductive material.
If overhead lines affect the work area, do not attempt the job. Contact the utility provider or a qualified professional for guidance.
Make shallow, controlled passes
Place the rake at the lower snow area and pull down small sections. Do not hook a large load high on the roof, and do not pull forcefully if the head catches.
Use these basic practices:
- Work in manageable strips from the lower roof area upward.
- Keep the rake from grinding against shingles, flashing, and roof-edge materials.
- Leave a light snow layer over the roof surface.
- Move away as snow falls; do not try to catch or guide it.
- Stop when snow is wet, frozen, unusually deep, or too heavy to move with gentle pulls.
Use extra care around roof-edge components
Work slowly around gutters, downspouts, flashing, skylights, vents, solar equipment, and other attachments. These components can be damaged by impact, and they can cause snow to catch or release unexpectedly.
Do not pull against gutters or use the rake to pry compacted snow from behind them. If snow or ice is tightly packed around a roof feature, leave it for professional assessment.
Roof Rake Mistakes to Avoid
Buying maximum reach instead of usable control
The longest roof rake is not automatically the best choice. A shorter rake that you can guide safely is more useful than a long pole that flexes, twists, or forces you to lean toward the fall zone.
Pulling down large slabs of snow
Large snow loads can injure the operator, block an entry, damage items below, or put stress on roof-edge components. Reduce the size of each pull, particularly when snow is dense or partly frozen.
Scraping shingles or chopping ice
Forcing a rake against the roof can dislodge granules, catch shingle edges, and damage flashing or gutters. A roof rake is not an ice chisel. Bonded ice and established ice dams may require a different approach and professional help.
Working in poor conditions
Postpone the task if wind, low visibility, slick footing, overhead electrical hazards, or an uncontrolled fall zone make the work unsafe. Snow removal can wait; an injury or electrical incident cannot.
Care and Off-Season Storage
After use, remove snow, grit, and moisture from the rake head, pole sections, connectors, and chute material. Let all parts dry before storing the tool.
Before the next storm, inspect:
- Pole locks, pins, and threaded connections.
- Plastic edges, bumpers, and rollers for cracks or excessive wear.
- Chute fabric and attachment points for tears or loose hardware.
- Grips and handles for secure attachment.
- Metal sections for corrosion, bends, or distortion.
Store the rake in a dry, protected location. Keep removable hardware together so the rake can be assembled correctly when needed.
Choosing the Best Roof Rake for Your Home
The best roof rake for snow is one that reaches the accessible lower roof area from stable ground and remains light enough to control. Choose a lightweight standard rake for low, open eaves; consider an extension-pole model only when you can operate it safely; use a chute-style design only when deeper snow and a clear fall zone make sense; and favor a narrow head where gutters and roof features demand precision.
For asphalt shingles, gentle technique matters more than aggressive clearing. Follow the manufacturer’s instructions, avoid scraping, leave a thin layer of snow on the roof, and stop when ice, height, weather, electrical lines, or visible roof damage makes DIY work unsafe.